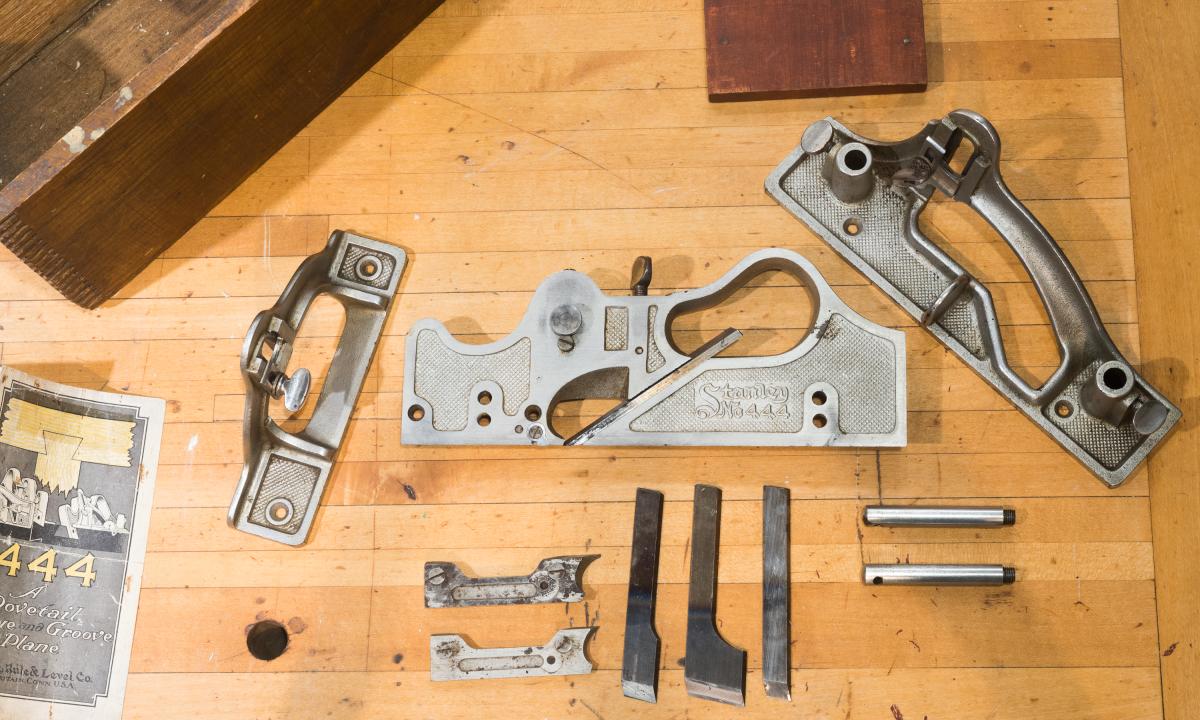
All the bits and bobs that are part of the Stanley 444
I have had a Stanley 444 since 1990. It is definitely one of the strangest planes Stanley ever made. I'm not really a Stanley collector - I bought the plane because it's a cool curiosity. I got it at a big antique show in New York City, where the seller happened to be at the time. I had that vague feeling I was doing something illegal. You know, the "I'm going to see a man about a dog" vibe. I came home poorer, but with a Stanley 444 dovetail plane, complete, in a wooden box. I've only used it for real once or twice. It works pretty well, but setting it up is a hassle and I don't do many sliding dovetails. But as it happens, the drawer dividers in my toolbox use the sliding dovetail so this was a perfect application. It's a little amusing that, ever the optimist, I keep the plane locked up in my regular toolbox, not with my collectible tools. I can't say the purchase was cost effective in any way, but the plane is fun to play with.
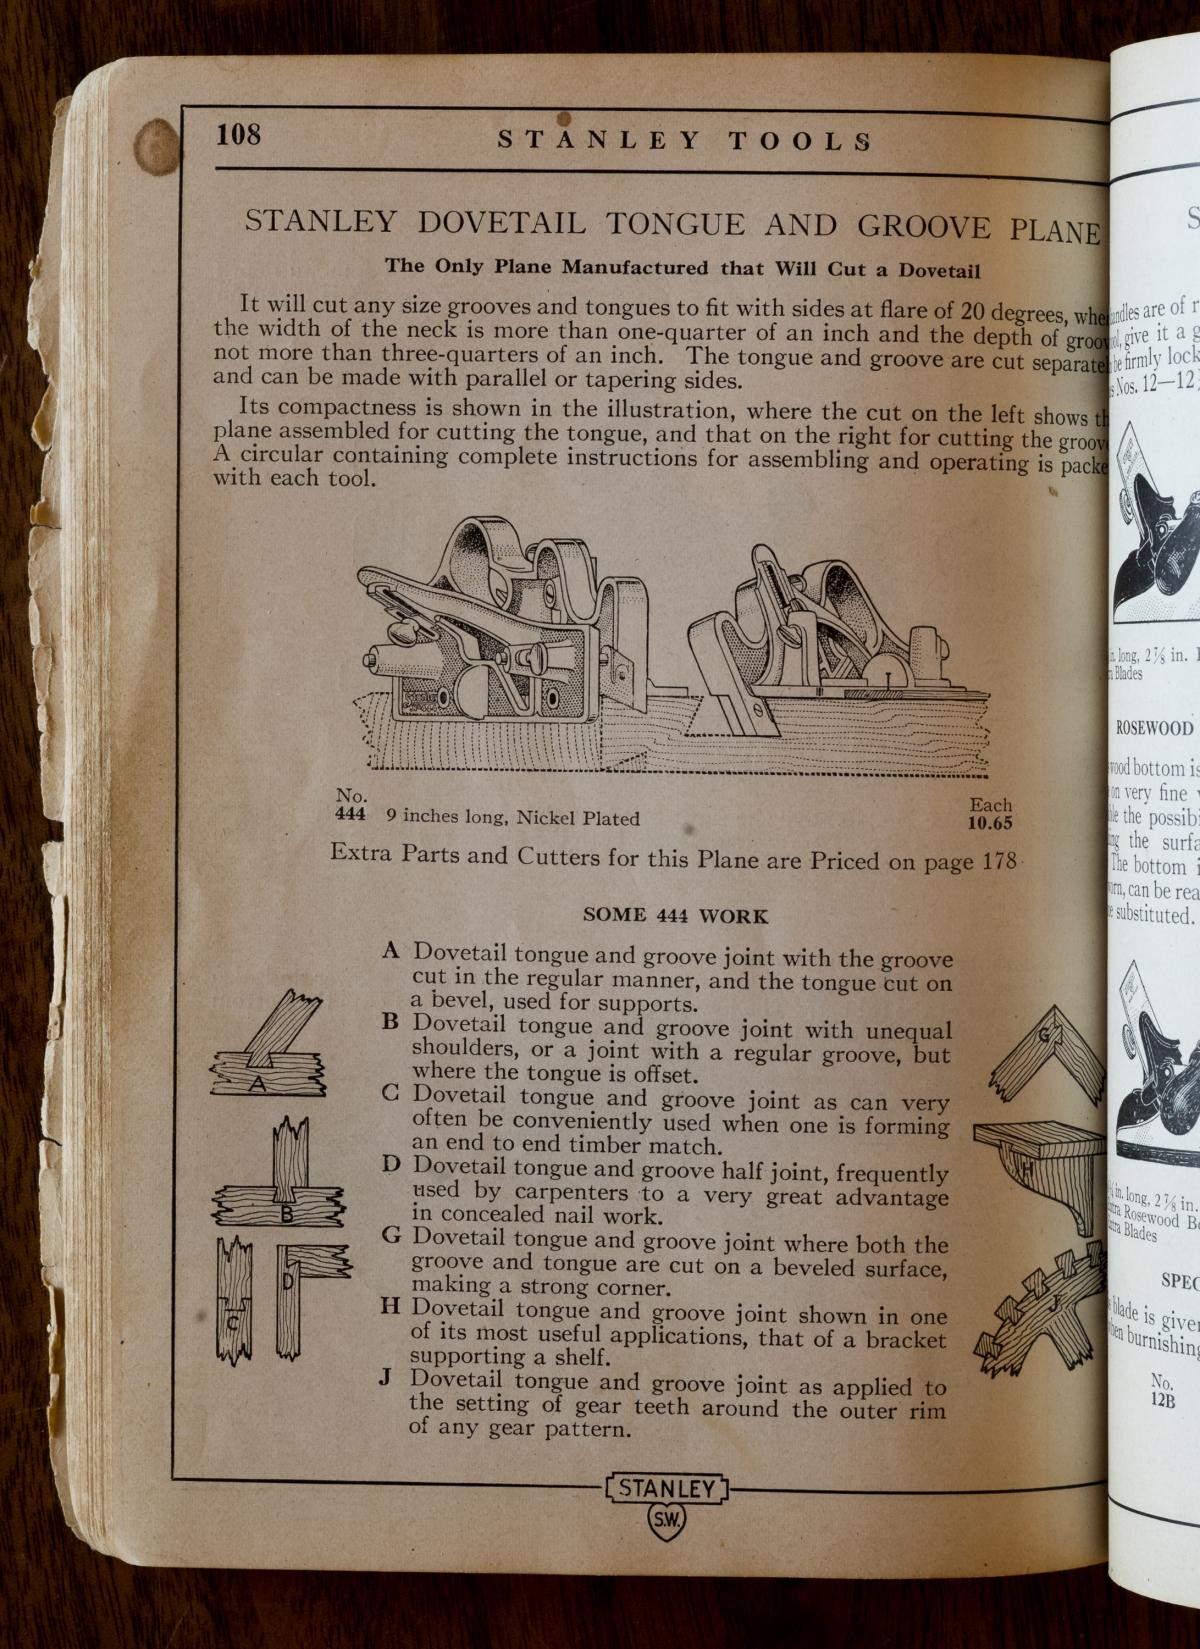
The plane was manufactured from 1912 to 1938. It never was particularly popular. It's one of those plane models that Stanley made simply because they could. It's an ingenious design. There are a fair number of wooden planes that can be used to cut a male part of a sliding dovetail. This plane uniquely also can cut the female side of the joint.
The plane's real appeal to me is that it a tour de force of early 20th century manufacturing technology. The sand castings are gorgeous. The nickel plating beautifully done. All the bits and bobs fit together perfectly. And, as mine is in very good shape, it works well.
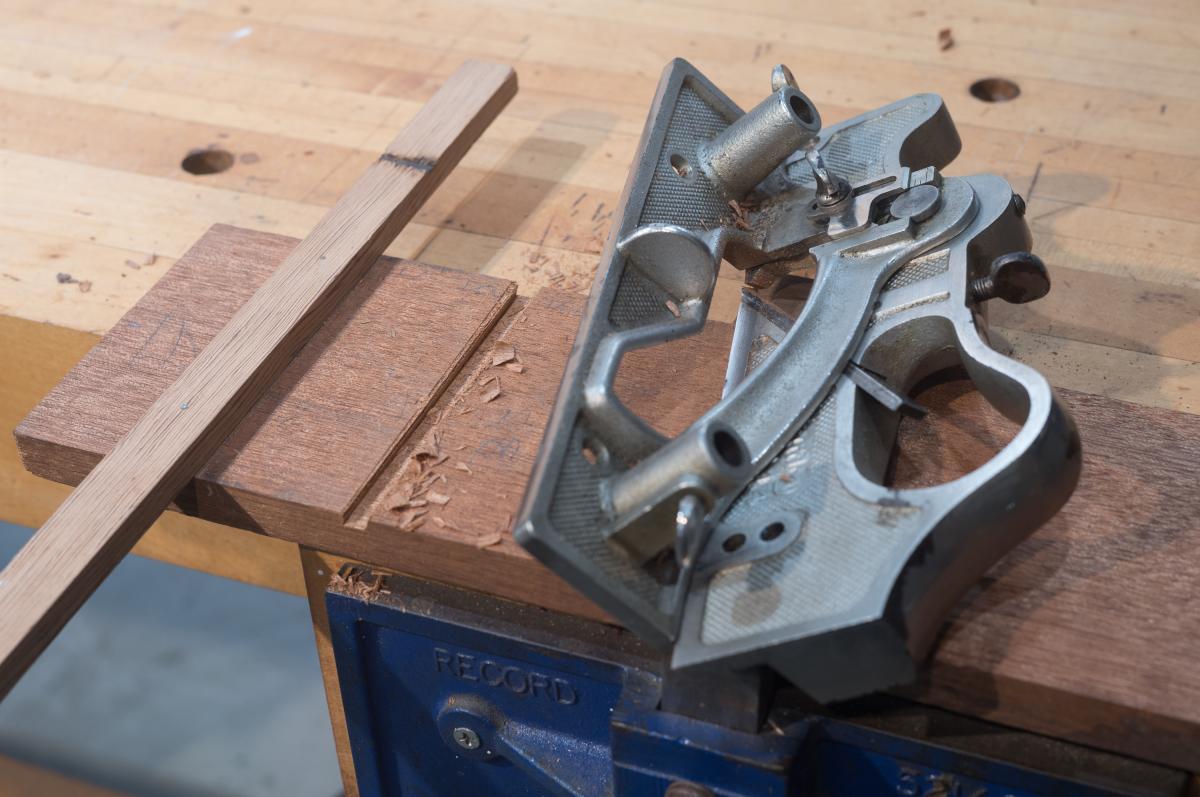
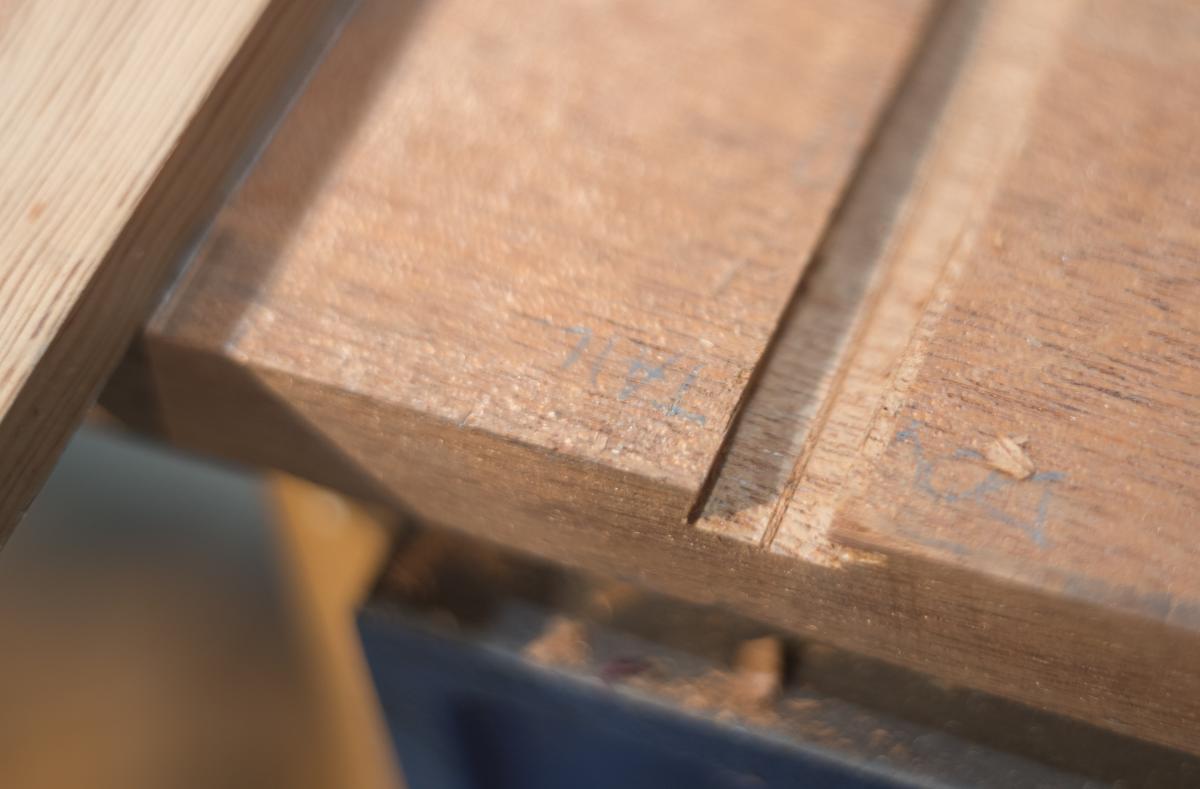
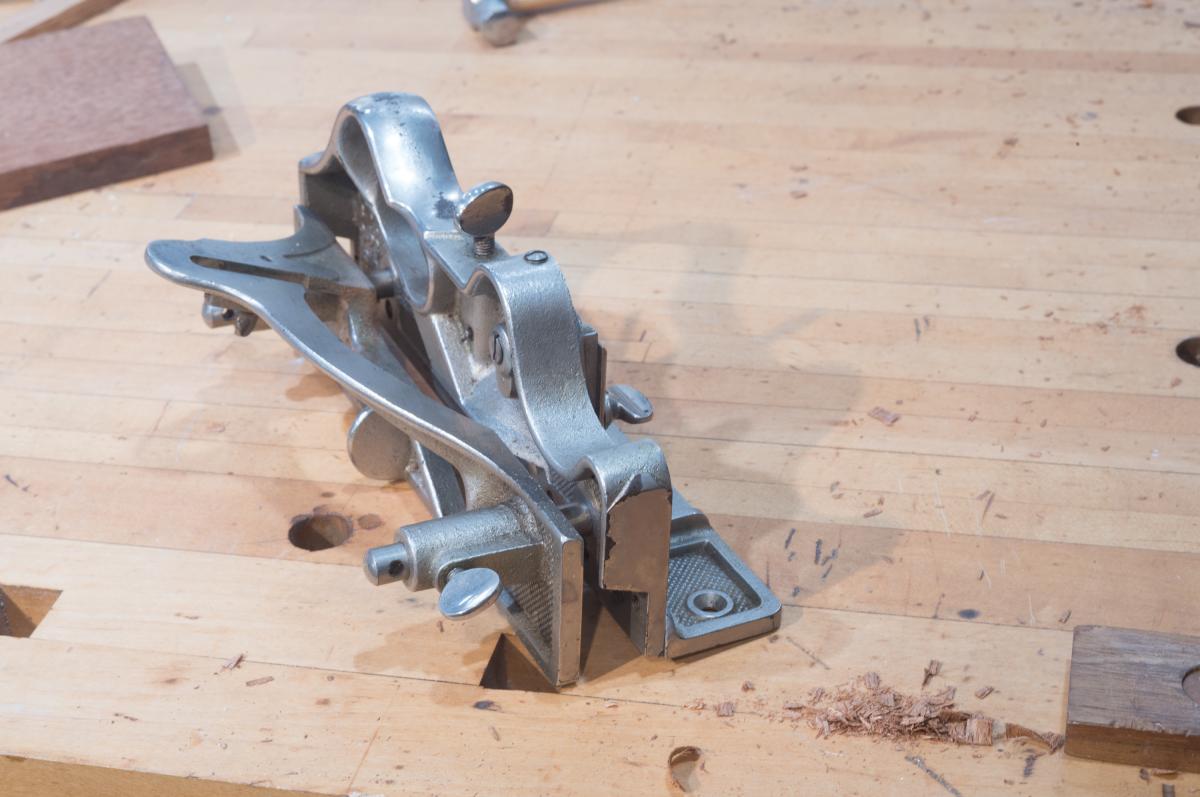
The way it works: to cut the female side of the joint, the plane is set up with an angled fence. The angled fence moves against a fixed bit of lathe that is attached to the work, and the body of the blade and ride up and down the fence, tilting if need be, to work a groove in the wood at the required angle. It's different than with a regular dado in that you need the angled fence to maintain the correct side angle to the dado. The plane has an ingenious pivoting mechanism that allows the body of the plane to tilt as it works the joint and descend until it reaches an adjustable stop to set the depth. The cutters of course are angled to produce a flat bottom. The pivot between the fence and body of the plane is perfect with no play - a tribute to Stanley's superb skill at casting and manufacturing. Without this precision the plane would not work. To cut the female side of the joint, the plane rides up and down the angled fence while the whole assembly goes back and forth against the wood batten, nailed to the work. An animated gif showing how the body of the plane can rock on the fence To cut both sides of groove, you have to reverse the fence and turn everything around. There is a visible small ridge at the center of the joint, which was slightly too wide for the blades, but nothing that a single pass of a chisel won't fix. There is also a bit of tearout on the exit from the first cut. I forgot to knife the exit line.
When you use the plane, you should cut the female side of the joint first, because getting the dimension spot on is tricky. The male side, which is done second, is a lot easier.
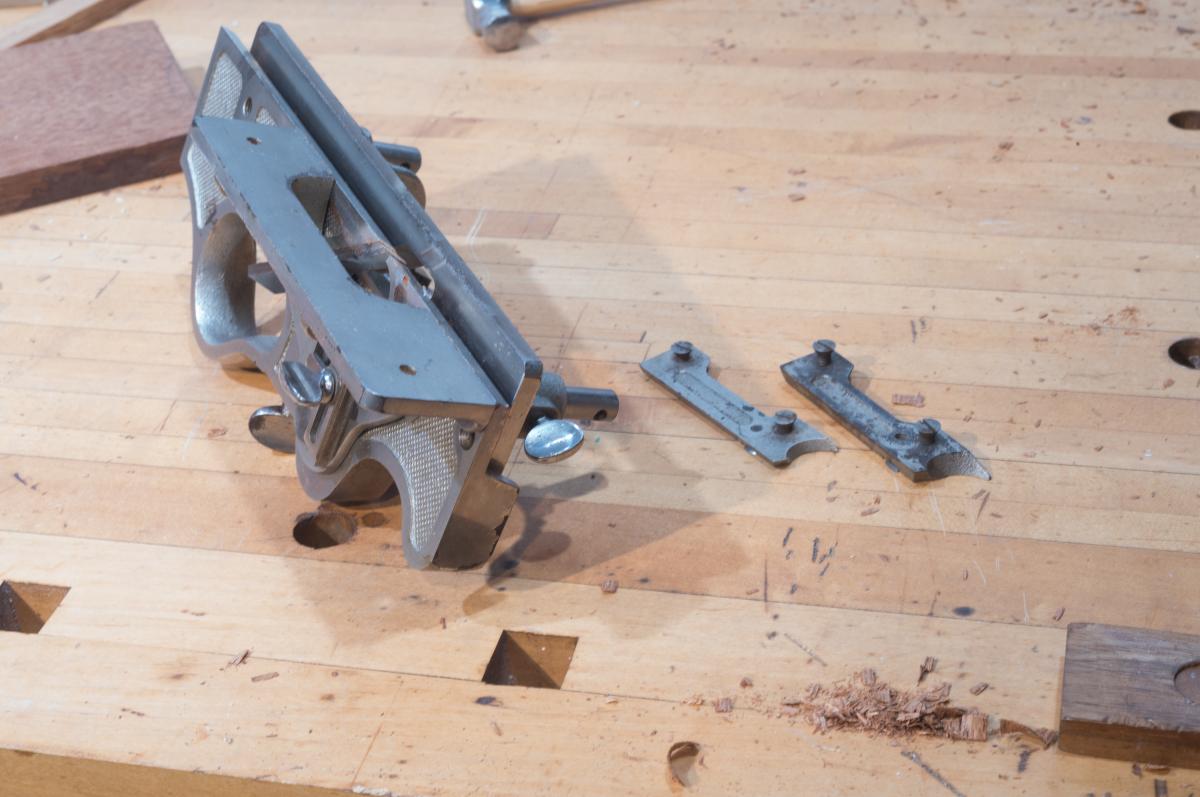
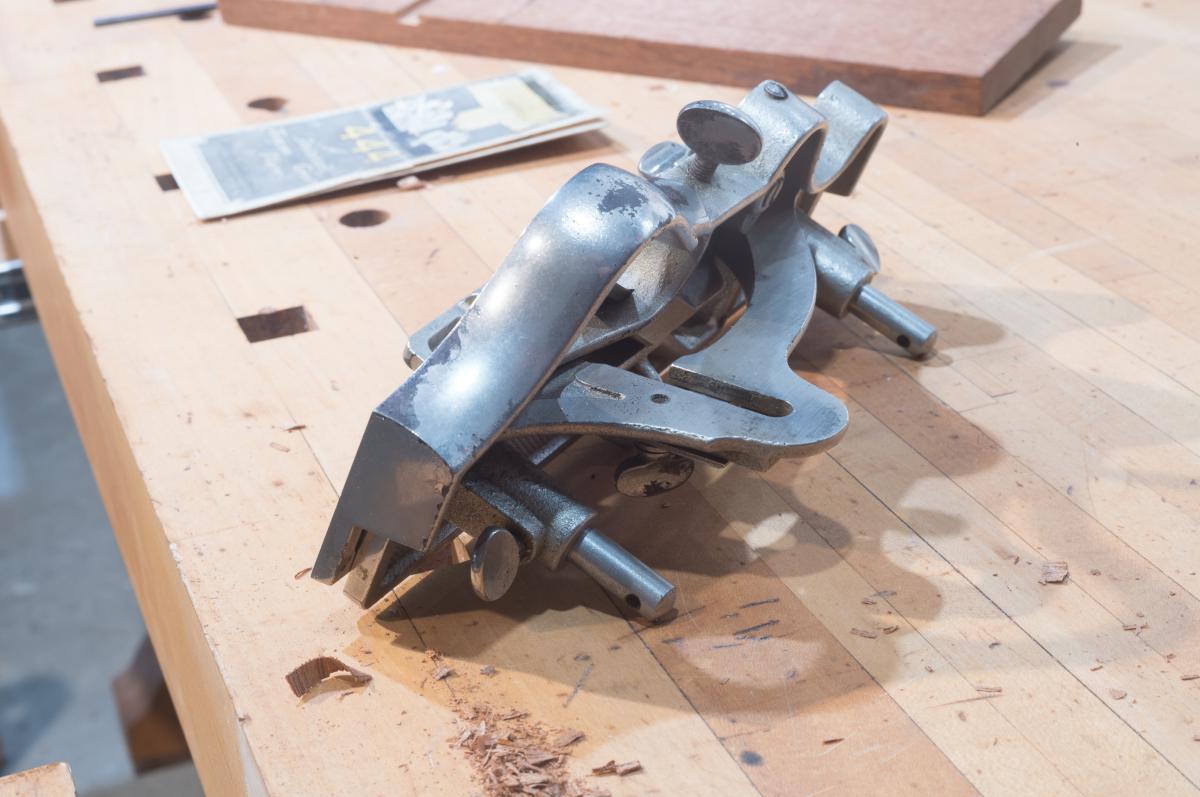
To do the male side, the angled fence is flipped over onto rods to set the length of the joint, and another small fence is used on the other side of the plane to set the depth of cut. Two standoffs are included with the plane to enable you to build it the width of the plane when you use larger iron. (There are four irons included with the plane). Just make sure there is enough support to make the cut easier and with less chance of digging in. Set up for cutting the male side of the joint. The big fence on the left is set for the width of the cut, the small fence on the right in the back, sets the depth Upside down and set up for cutting the male side of the joint, the two filler pieces are the right are used to give support in front of the cutting edge when planing creating wider joints. The same setup as previously, but now right side up
Because dados are cut cross grain there are retractable cutting spurs everywhere.
The plane is is great condition - with the exception of some plating worn away here and there; the spurs are a little worn out, although usable; the instructions are torn; and the box is beat up and missing its lid. The reason the Stanley 444 is rare is because in spite of it being ingenious it's not a great way of cutting a sliding dovetail. It works fine, and with practice I could certainly make it work better. But I can actually cut the female side of a sliding dovetail faster by hand using a saw and couple of chisels. The other problem with the tool is that, unless the cutters are sharp, in good shape, and at the right angle, the plane will cause trouble. And the spurs do need to be sharp. But maybe the most important reason why that Stanley stopped production of the 444 in 1938 was timing: the Great Depression and changes in style that certainly kicked the teeth out of a lot of small shops. It's possible that after World War II there could have been a small resurgence in demand, but the post-wars period was when portable power tools first became ubiquitous and this type of tool became truly obsolete.
In other news, we have a vacancy in the our showroom staff and we're looking for a sales associate for Fridays. If you're in the Brooklyn area, interested in tools, and looking for part-time work every Friday, please send a little note and a resume to jobs@toolsforworkingwood.com.
A small siding dovetail in my toolbox till, to affix the dividers was made with the 444
From the 1930 Catalog #34
Join the conversation
03/08/2023 Hb
Always excellent blogs . Thank you !
03/08/2023 L E.
Great article! Please, please, film the use of your Stanley 444 and post it here or on YouTube. The Stanley 444 is SO rare that there are no use videos to be found.
I would love to do a film but I am video challenged. If logistics allow - and if someone wants to come to the shop one day I suppose we could set it up and they could film it.
03/09/2023 Ed Furlong
Loved learning about the 444. I have seen a photo or two, but your explanation of how it works was pretty clear and a good use of photos and text to get the information across. I won't be going out of my way to find one of these, but if I come across one out there in the wild, I definitely will pick it up! --Ed


 Joel's Blog
 Built-It Blog
 Video Roundup
 Classes & Events
 Work Magazine